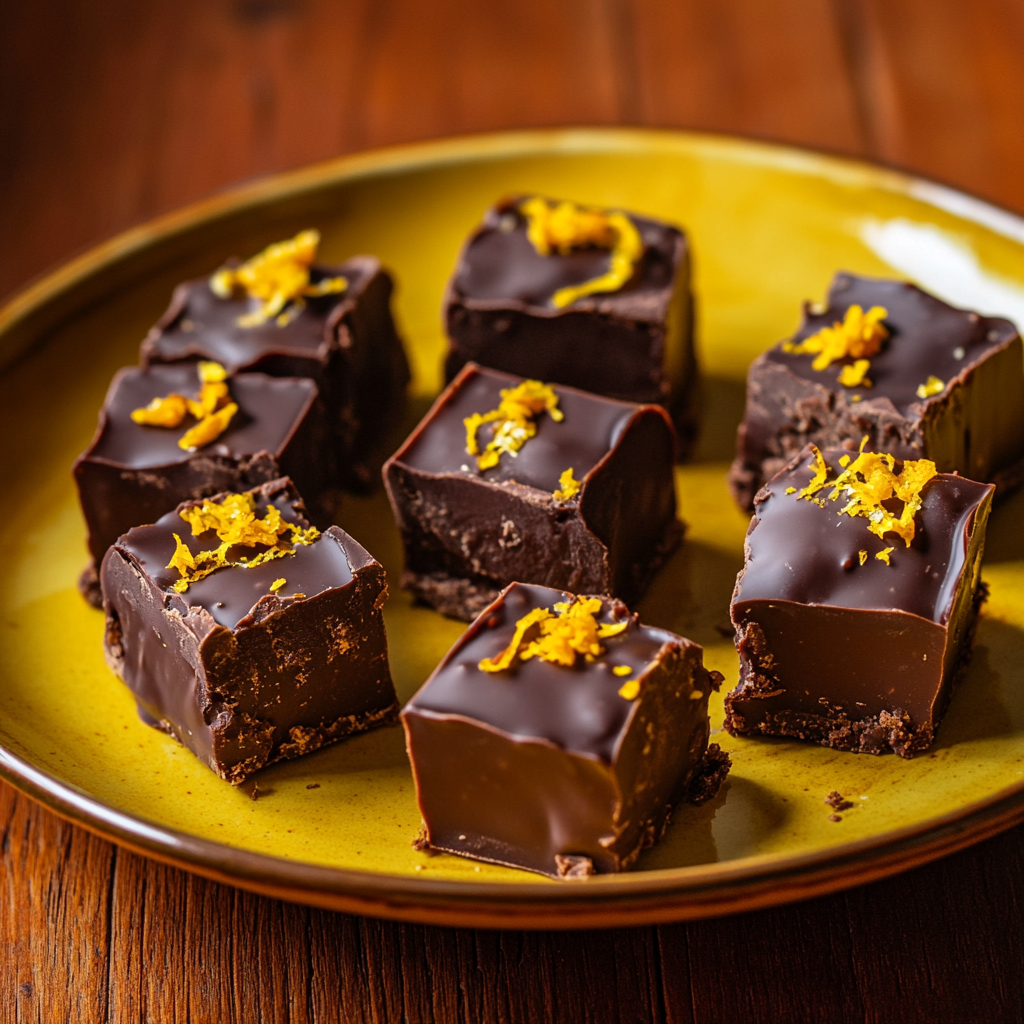

I never thought making fudge could be this easy until I tried this recipe. If you love those chocolate orange treats from the store, you’re going to absolutely love making this at home.
The first time I made this fudge, I was just looking for a quick dessert to bring to a family dinner. I had some chocolate in my pantry and oranges on my counter, and thought “why not?”
What makes this recipe special is that you don’t need any fancy tools or baking skills. Just mix everything in one pot, let it chill, and you’re done! The dark chocolate makes it rich but not too sweet, and the orange gives it such a fresh, bright taste.
I’ve made this fudge many times now – for family gatherings, as holiday gifts, and just for sweet treats at home. It always turns out great, and people can’t believe it’s homemade.

Why You’ll Love This Recipe
- No Baking Required: Perfect for hot summer days or when you don’t want to use the oven
- Only 6 Base Ingredients: Simple, accessible ingredients you might already have
- Make-Ahead Friendly: Ideal for preparing days in advance of special occasions
- Customizable: Easy to adapt with different toppings and mix-ins
- Gift-Worthy: Perfect for holiday gifts, cookie exchanges, or care packages
- Foolproof Method: Even beginners can achieve professional-looking results
Quick Facts
No-Bake Chocolate Orange Fudge is a delightfully easy confection that combines rich dark chocolate with bright citrus flavors, creating a smooth, creamy treat without any need for an oven. The recipe relies on melting chocolate with sweetened condensed milk and butter, then enhancing it with fresh orange zest and orange extract for that perfect chocolate-orange balance.
Once mixed, the fudge is simply poured into a pan and chilled until firm, making it an ideal treat for warm days or when you want something special without complex baking.
The result is a velvety, melt-in-your-mouth candy that captures the classic pairing of chocolate and orange in an approachable, homemade form that’s perfect for gifting, special occasions, or simply satisfying a sweet craving. Its appeal lies in both its simplicity to make and its rich, sophisticated flavor profile that tastes like it came from a professional candy shop.
- Prep Time: 15 minutes
- Chill Time: 2 hours
- Total Time: 2 hours 15 minutes
- Servings: 36 pieces
- Calories: 98 per piece
- Difficulty Level: Easy
Equipment Needed

- Medium Saucepan: Essential for gently melting chocolate without burning; heavy-bottomed preferred for better heat distribution
- Silicone Spatula: Helps scrape every bit of chocolate and ensures thorough mixing without scratching your pan
- 8×8-inch Baking Dish: Creates the perfect thickness for traditional fudge squares
- Parchment Paper: Prevents sticking and makes removal effortless
- Microplane or Zester: For obtaining fine orange zest without bitter pith
- Sharp Knife: Ensures clean cuts for professional-looking pieces
- Measuring Spoons/Cups: For precise measurements crucial in candy making
- Candy Thermometer (optional): Helps monitor chocolate temperature to prevent seizing
Ingredients

Base Recipe
- 2 cups dark chocolate chips (or chopped dark chocolate, at least 60% cocoa)
- 1 can (14 oz) sweetened condensed milk
- 2 tbsp unsalted butter (melted)
- 1 tsp orange extract
- 1 tbsp fresh orange zest (plus more for garnish)
- ¼ tsp salt
Optional Toppings
- Melted dark chocolate for drizzling
- Extra orange zest
- Flaky sea salt
- Candied orange peel
- Gold leaf (for special occasions)
How To Make
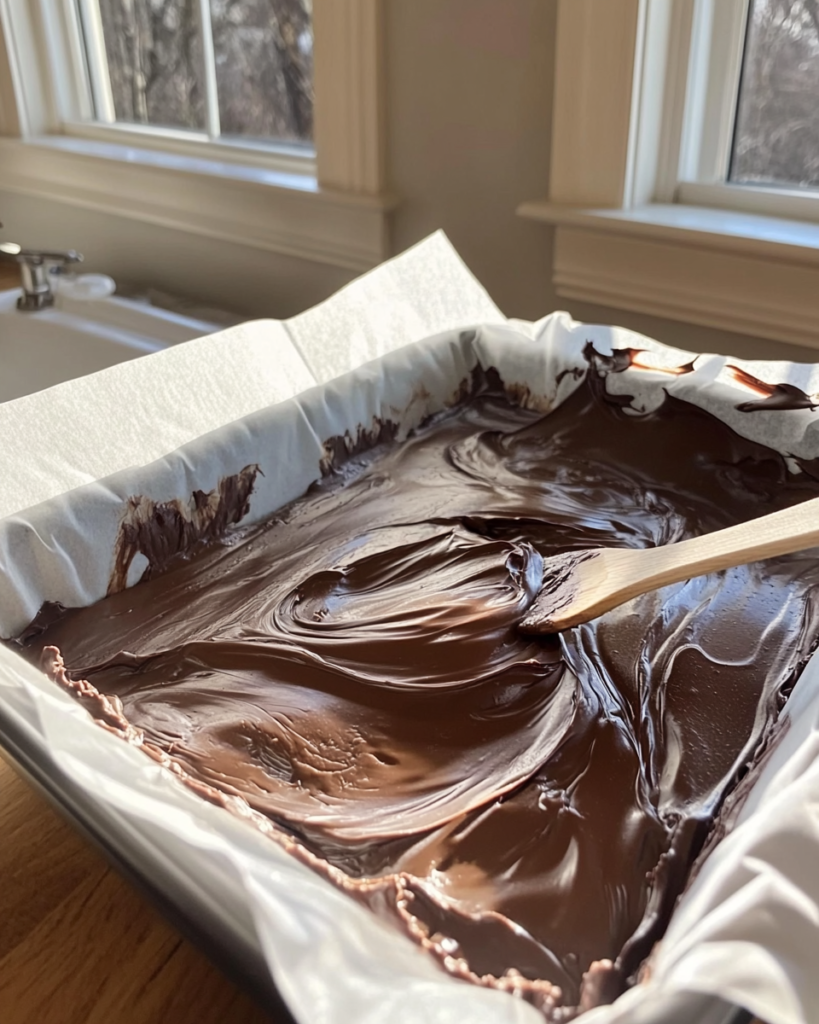
1. Before you start, line your 8×8-inch baking dish with parchment paper, leaving some hanging over the sides to help lift the fudge out later. Get all your ingredients measured and ready.

2. Start by melting your dark chocolate chips, sweetened condensed milk, and butter together in a medium saucepan. Keep the heat low and stir constantly – this is important to prevent the chocolate from burning. The mixture will be thick and glossy when it’s ready.

3. Take the pan off the heat once everything is melted and smooth. Now stir in your orange extract, fresh orange zest, and salt. Mix until everything is well combined. Take a quick taste and add a bit more orange extract if you want a stronger orange flavor.
4. Pour the mixture into your lined baking dish. Use your spatula to spread it evenly into the corners. Give the pan a few gentle taps on the counter to remove any air bubbles.
5. If you want to add toppings, now’s the time. You can sprinkle on some extra orange zest, drizzle with melted chocolate, or add a pinch of sea salt – whatever you like.

6. Put the dish in the refrigerator and let it chill for at least 2 hours, or until the fudge is completely firm. Overnight chilling works great, too.
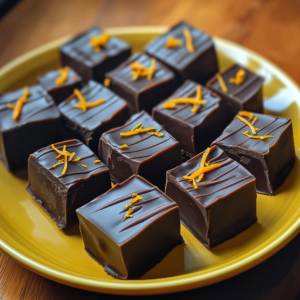
7. Once the fudge is firm, lift it out of the pan using the parchment paper. Use a sharp knife to cut it into squares. For clean cuts, wipe your knife with a warm, damp cloth between cuts.

Your fudge is ready to serve! Keep it in an airtight container in the fridge for up to 2 weeks. You can also freeze it for up to 3 months – just wrap it well and thaw in the fridge before eating.

Pro Tips
- Temperature Control is Key
- Use low heat consistently
- Never let water come into contact with melting chocolate
- Remove from heat while a few chocolate pieces remain and let residual heat complete the melting
- Ingredient Preparation
- Have all ingredients measured and ready before starting
- Bring butter to room temperature
- Zest orange before starting to prevent rushing
- Texture Optimization
- Don’t overwork the mixture once combined
- Tap pan gently on counter to remove air bubbles
- Allow to cool at room temperature for 30 minutes before refrigerating
- For Professional-Looking Results
- Line pan with parchment paper extending over edges
- Use a ruler for evenly sized pieces
- Heat knife in hot water and wipe dry between cuts
Troubleshooting Common Issues
Chocolate Seized
- Problem: Chocolate becomes grainy or lumpy
- Solution: Whisk in 1-2 teaspoons of warm vegetable oil until smooth
Fudge Too Soft
- Problem: Doesn’t hold shape at room temperature
- Solution: Return to refrigerator for 1 hour; check condensed milk measurements
Fudge Too Hard
- Problem: Difficult to cut, very firm
- Solution: Let stand at room temperature longer before cutting
Ingredient Alternatives
- Chocolate: Semi-sweet, milk chocolate, or white chocolate (adjust sweetness accordingly)
- Condensed Milk: Coconut condensed milk for dairy-free version
- Orange Extract: 2-3 tbsp orange liqueur or 2 tsp orange oil
- Butter: Coconut oil or vegan butter
- Dark Chocolate: Any chocolate between 54-70% cocoa will work
Storage Guidelines
- Room Temperature: Up to 3 days in airtight container
- Refrigerator: Up to 2 weeks in airtight container
- Freezer: Up to 3 months when properly wrapped
- Best Practices: Layer with parchment paper between layers
- Thawing: Overnight in refrigerator
Serving Suggestions
- Casual: Cut into squares and serve on their own
- Elegant: Pair with after-dinner coffee or port wine
- Gift: Package in decorative boxes with tissue paper
- Dessert Table: Arrange on tiered stand with other confections
- Holiday: Serve alongside other citrus desserts
Variations
- Dark Chocolate Raspberry Fudge
- Replace orange with raspberry extract
- Add freeze-dried raspberry powder
- Triple Chocolate Orange
- Layer with white and milk chocolate
- Add chocolate orange segments on top
- Nutty Orange Chocolate
- Add 1/2 cup toasted hazelnuts
- Top with crushed nuts
- Spiced Orange Chocolate
- Add 1/4 tsp cinnamon
- Pinch of cayenne pepper
Frequently Asked Questions
Can I use milk chocolate instead of dark chocolate?
Yes, but reduce the amount of condensed milk by 2 tablespoons as milk chocolate is sweeter.
Why did my fudge become grainy?
This usually happens when chocolate is overheated. Use low heat and stir constantly to prevent this.
Can I make this without condensed milk?
While possible, condensed milk provides the best texture. Alternative recipes would require different ratios and methods.
How long does it take to set completely?
Minimum 2 hours in the refrigerator, but overnight is best for optimal texture.
Can I double the recipe?
Yes, use a 9×13-inch pan and increase chill time by 1 hour.

And there you have it, your very own batch of homemade chocolate orange fudge! This recipe has become my go-to when I need something special that doesn’t take all day to make. Don’t worry if your first batch isn’t picture-perfect, what matters is that rich chocolate taste and fresh orange flavor.
I’d love to see how your fudge turns out! Tag me in your photos or leave a comment below with your favorite way to serve it. Did you try any different toppings? Make it extra orangey? Share your twist on the recipe.
Recipe Card
Irresistible No-Bake Chocolate Orange Fudge
Ingredients
Base Recipe
- 2 cups dark chocolate chips or chopped dark chocolate, at least 60% cocoa
- 1 can 14 oz sweetened condensed milk
- 2 tbsp unsalted butter melted
- 1 tsp orange extract
- 1 tbsp fresh orange zest plus more for garnish
- ¼ tsp salt
Optional Toppings
- Melted dark chocolate for drizzling
- Extra orange zest
- Flaky sea salt
- Candied orange peel
- Gold leaf for special occasions
Instructions
- Before you start, line your 8×8-inch baking dish with parchment paper, leaving some hanging over the sides to help lift the fudge out later. Get all your ingredients measured and ready.
- Start by melting your dark chocolate chips, sweetened condensed milk, and butter together in a medium saucepan. Keep the heat low and stir constantly – this is important to prevent the chocolate from burning. The mixture will be thick and glossy when it’s ready.
- Take the pan off the heat once everything is melted and smooth. Now stir in your orange extract, fresh orange zest, and salt. Mix until everything is well combined. Take a quick taste and add a bit more orange extract if you want a stronger orange flavor.
- Pour the mixture into your lined baking dish. Use your spatula to spread it evenly into the corners. Give the pan a few gentle taps on the counter to remove any air bubbles.
- If you want to add toppings, now’s the time. You can sprinkle on some extra orange zest, drizzle with melted chocolate, or add a pinch of sea salt – whatever you like!
- Put the dish in the refrigerator and let it chill for at least 2 hours, or until the fudge is completely firm. Overnight chilling works great too.
- Once the fudge is firm, lift it out of the pan using the parchment paper. Use a sharp knife to cut it into squares. For clean cuts, wipe your knife with a warm, damp cloth between cuts.
- Your fudge is ready to serve! Keep it in an airtight container in the fridge for up to 2 weeks. You can also freeze it for up to 3 months – just wrap it well and thaw in the fridge before eating.